LASCON 2022 Badge Challenge
Preface
It was noted during the official walkthrough that my technique for finding the target GitHub profile was not exactly how it was designed. I just wanted to point out that there’s a good bit of the OSINT portion that I completely missed out on because I took a bit of a shortcut by abusing GitHub’s commit linking feature.
Entry point
Like previous years’ badge challenges, the entry point for this year’s challenge was a QR code on the back of the badge. The badge game at LASCON originally started as a way to take up space on the back of the badge but has turned into a sort of tradition and something that many people (myself included) look forward to each year.

Step 1: The Target
The badge code pointed to this site: https://www.qrcodechimp.com/page/rjcdbd8js0dj?chk1666288467 which contains a vCard with some contact info.
Okay, so there’s a phone number, an email address for the badge game, and a LinkedIn profile. Additionally, there are two images and a blurb of text.
Name: Lisa Alto
Phone number: (███) ███-████ (redacted because it's not important 🙂)
Email: [email protected]
LinkedIn: https://www.linkedin.com/in/lisa-alto-57079b24b/
Phone number
Searching for the phone number didn’t turn up anything. Calling and texting did not produce anything of note either.
Summary
Welcome to the LASCON 2022 Badge Game! If you’ve played the game in the past, this year’s game will be a bit different. Meet Lisa Alto…a young college student and aspiring cryptocurrency mogul. She’s been playing around with smart contracts, but security isn’t her strong suit. She minted an NFT, but there’s a bug in her code. Figure out how to take ownership of the NFT and transfer it to yourself to win the game. There’s a challenge coin waiting for you if you can do it!
Ready to get started? Great! Go to aHR0cHM6Ly9iYWRnZWdhbWUyMDIyLmxhc2Nvbi5vcmcv to create a profile. We’ll need real information so we can get you your challenge coin when you win and you’ll need to enter your Profile’s Unique ID into the data bytes section when you transfer the NFT in order to prove it was you. Note that we are using this Unique ID in order to ensure that your name and contact information doesn’t show up in the public ledger.
Special thanks goes out to Ralph Lauren, Arunkumar Sadasivan and Josh Sokol for putting this challenge together for you.
aHR0cHM6Ly9iYWRnZWdhbWUyMDIyLmxhc2Nvbi5vcmcv is probably encoded somehow. From past CTFs, I knew to try base64 first. Base64 decoding the string gave me the URL https://badgegame2022.lascon.org/. Visiting the URL brings you to the actual CTF website, where you can register a team and view the leaderboard.
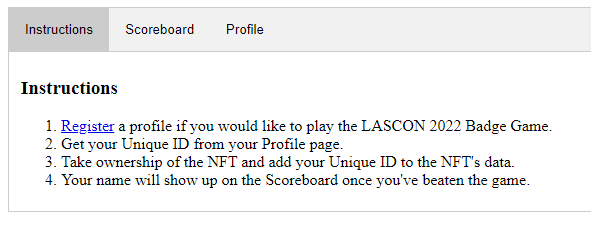
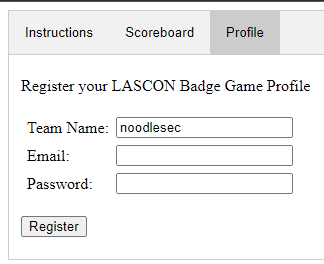
After registering a team, I realized I was going to be completely out of my element dealing with an NFT, but that I should focus on finding the actual NFT. To do so, I would need to find a profile for Lisa.
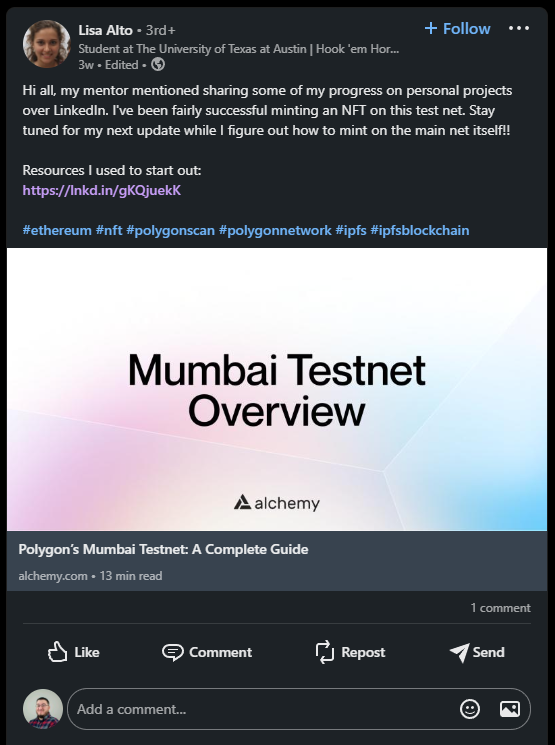
Going through the LinkedIn link, this user only has two posts. The first one is pretty much empty, and the second one has a link to a tutorial about connecting to Polygon’s Mumbai Testnet. I followed the link and used instructions to get connected and create a wallet on MetaMask. This is good information because we now know which ledger the NFT is minted on.
2. Finding the NFT
I spent a lot of time looking for the NFT. I tried searching PolyScan for transactions and timestamps but came up empty. Additionally, I tried the main stenography tools on the profile image and background image from the vCard to no avail. After racking my brain for a while, I thought about where a new blockchain developer would keep their (presumably exploitable) code. GitHub is generally the answer here. So I started looking for GitHub profiles for Lisa.
After spending hours trying different search criteria on Github and browsing pages of results, I took a break to get some food. While I was out, I realized I had completely ignored the email address from the vCard. I tried searching it directly on GitHub a few times with no results, when finally I thought about how commit linking on Github works. You can essentially commit code with any email address, then when you push the commit to a repo on Github, it will link the commit to the user with that email. I don’t think this is a novel OSINT technique, but it has worked for me on a few occasions.
So I quickly created a new GitHub repo, changed the email in the username to [email protected], and pushed the commit to my new repo. BOOM that’s it! I go look at Github, and sure enough, it’s linked the commit to an existing user with a profile image matching the vCard:
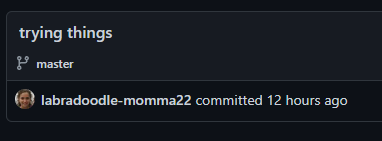
The user @labradoodle-momma22 on Github was created a few days ago and only has one project:
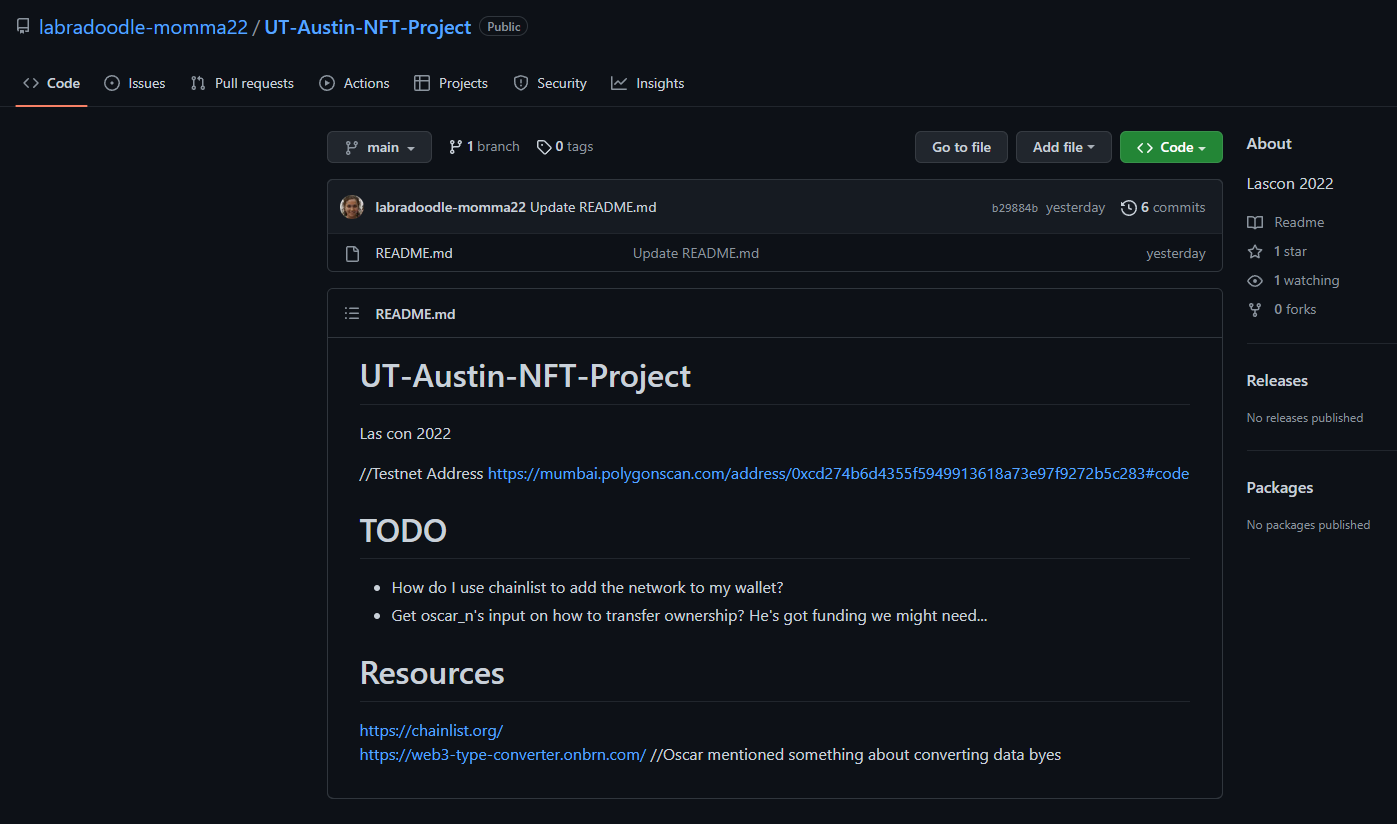
So now we know the address of the NFT contract! Now, what the hell is an NFT contract?
3. Exploiting the vulnerable smart contract
So now that I’ve watched the first 4 minutes of a 90-minute-long video about smart contracts, I feel as if I am an expert on the subject. My understanding is that a smart contract is a bit of stateful code which lives on a blockchain. And to interact with the code, you must send a transaction and pay gas fees. I was able to use the Mumbai Faucet to get some MATIC for gas fees.
The next step was to review the code and look for vulnerabilities. The contract code can be found at https://mumbai.polygonscan.com/address/0xcd274b6d4355f5949913618a73e97f9272b5c283#code or in this Gist.
In the contract code, we can see some public functions of this contract which are also exposed in the PolygonScan details
These are marked read-only
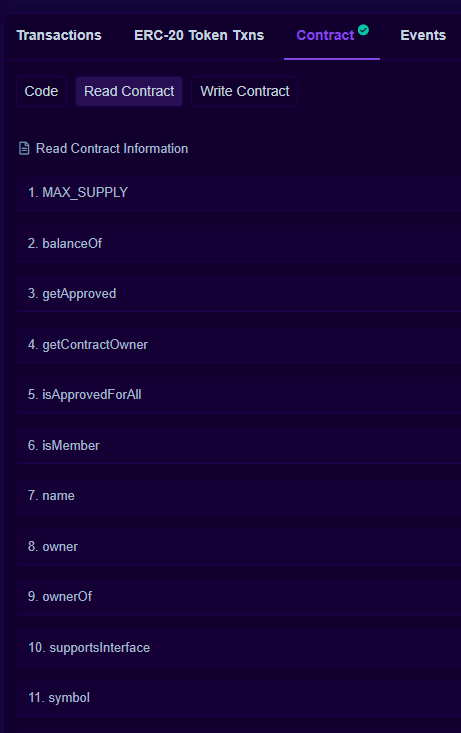
and these are not, so I’m assuming these can mutate the state of the contract.
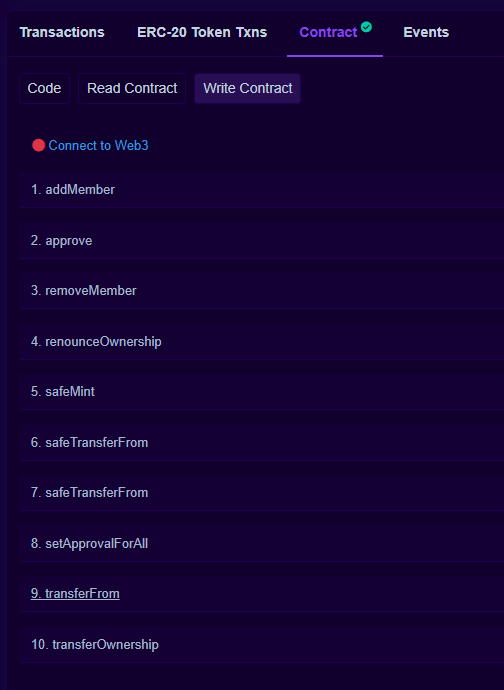
So let’s dig in. The instructions say that we will need to take ownership of the NFT and add our unique ID to the data. So we are looking for a function that can transfer ownership and also accepts some extra data. Let’s look over the obvious ones:
transferOwnership
This is a good candidate function. It appears to do what we want, but the problem is that it does not accept any extra data. The signature for this function is function transferOwnership(address newOwner) public virtual onlyOwner;. The other problem is that this function appears to make the transfer at the contract lever rather than the token level. Seeing that we can’t provide our unique ID, we will set this aside for a moment since it doesn’t fit the requirements. There are a couple of functions that are similar but don’t match the requirements such as transferFrom which only accepts a from, to, and tokenID parameters.
safeTransferFrom
This function has two overloads, one that takes extra data and one that doesn’t. Let’s analyze the base implementation:
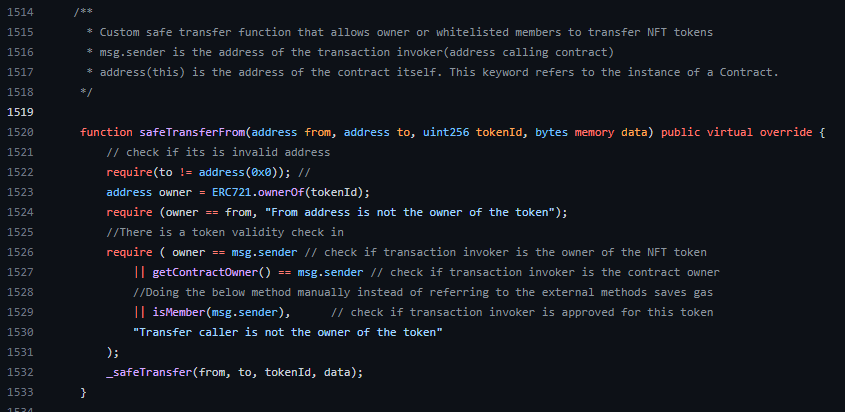
Sequentially, this function does some safety checks before transferring ownership of a token:
- Is the
toaddress even valid? - Is the
fromaddress equal to the current owner of the contract? - A bunch of checks combined with logical OR, i.e. if we can make any of these return true, then we can transfer ownership:
- Is the sender address equal to the token owner address?
- Is the sender address equal to the contract owner address?
- Does
isMemberreturn true for the sender address?
1. seems to be a consistency check, so this should always pass for a valid transaction.
2. seems like it would have to be accurate when I invoked this function. If someone else were to make the transfer before me, I would have issues here. Luckily I didn’t see anyone else making transactions on this contract at the time so I knew it was good.
It was obvious to me that the sender’s address could not be faked, so 3.1 and 3.2 were out of the picture.
3.3 might be a good place to focus. To figure out if isMember could be tricked into returning true, we needed to analyze its code.

The code for isMember is pretty simple. It takes an address and returns true if it’s an element of this list members. Looking around for code that interacts with the members list, and right below isMember, we see a function called addMember.
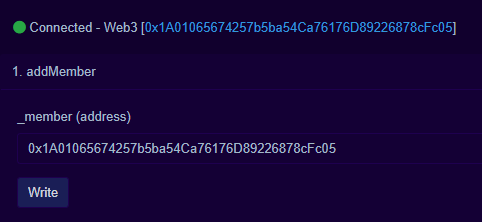
The addMember function is a public function that receives an address and first checks if the address is in the members list. If so, the transaction fails. If not, it adds the address to the list and fires an event MemberAdded. Additionally, this function does not have the onlyOwner modifier and thus can be called by anyone.
This is the trick. We now have all the pieces needed to take ownership of the token.
- First, we need to call
addMemberwith our wallet address. The transaction for this is here: https://mumbai.polygonscan.com/tx/0x740cc28a464c0159448b093a28778759b1285cc585ad149302e7bae630f6d73d
- Then, we need to call
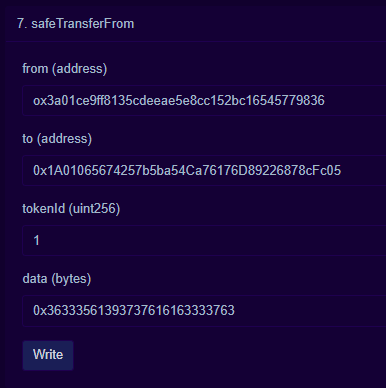
safeTransferFromwith our ID in thedatafield and wallet address in thetofield. Additionally, we need to know who the current owner of the token is, which we can do by calling theownerOffunction with the token ID. We are using a token ID of1since thetotalSupplyfield reads1andtokenByIndexreturns1when passed0.
At the time, the token owner was 0x3a01ce9ff8135cdeeae5e8cc152bc16545779836. The last piece I needed was to convert my unique ID to hex, which was easy using the link provided in the GitHub repo.
So here’s the transaction which put me on the board!
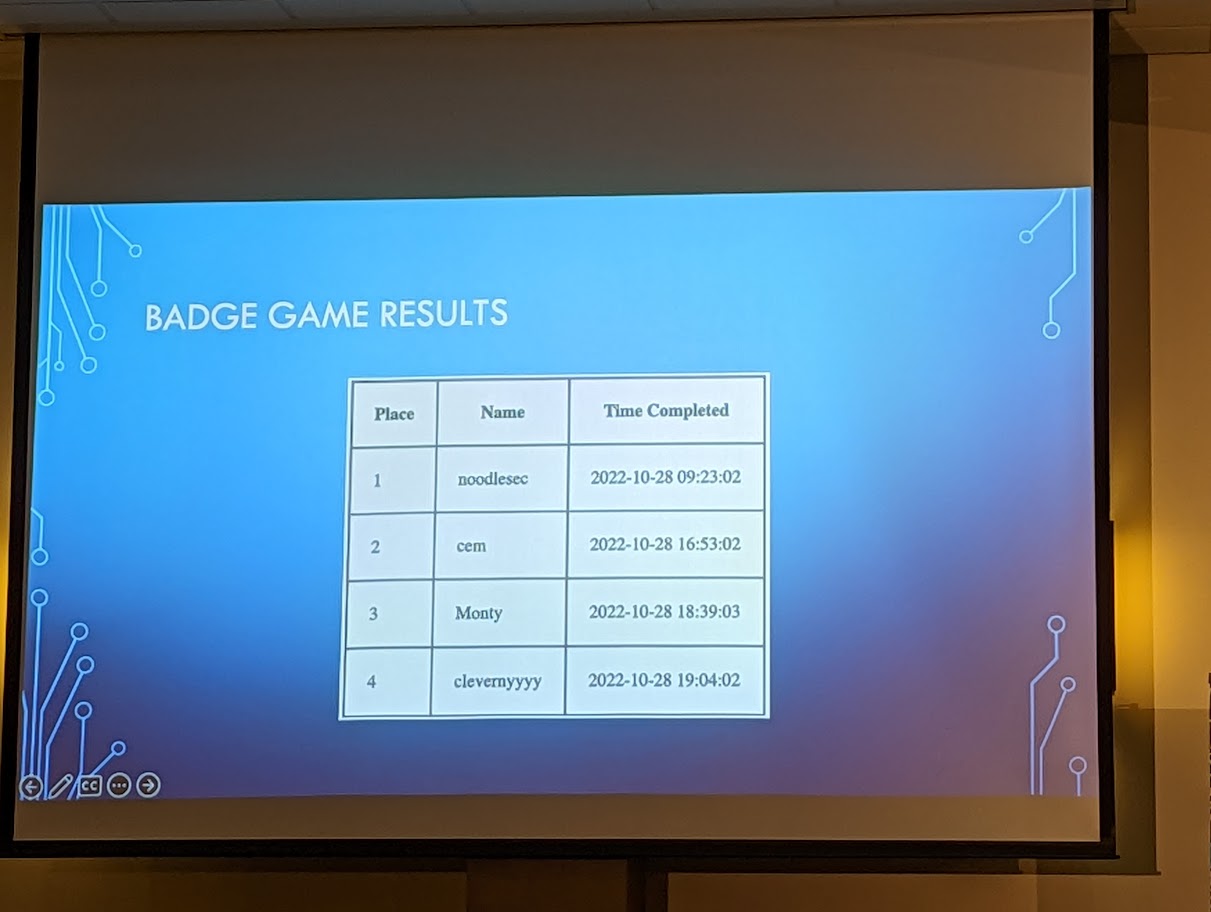
And here we are on the board! noodlesec FTW!
4. Conclusion
This was a super fun badge game. It forced me out of my element with the NFT and smart contract portion and also forced me to learn a couple of things. Blockchain development hasn’t been high up on my radar and I honestly don’t know that I will do more in the future, but I’m glad to have had some exposure. (*adds blockchain expert to my resume*)
This is one of the best parts of LASCON and why I will travel 5-6 hours to attend. Not necessarily the badge game itself, but the amount of exposure to new ways of thinking and raw expertise that comes with a conference like this is rad. See y’all next year!
About LASCON
LASCON is an OWASP-associated conference held annually in Austin, TX.